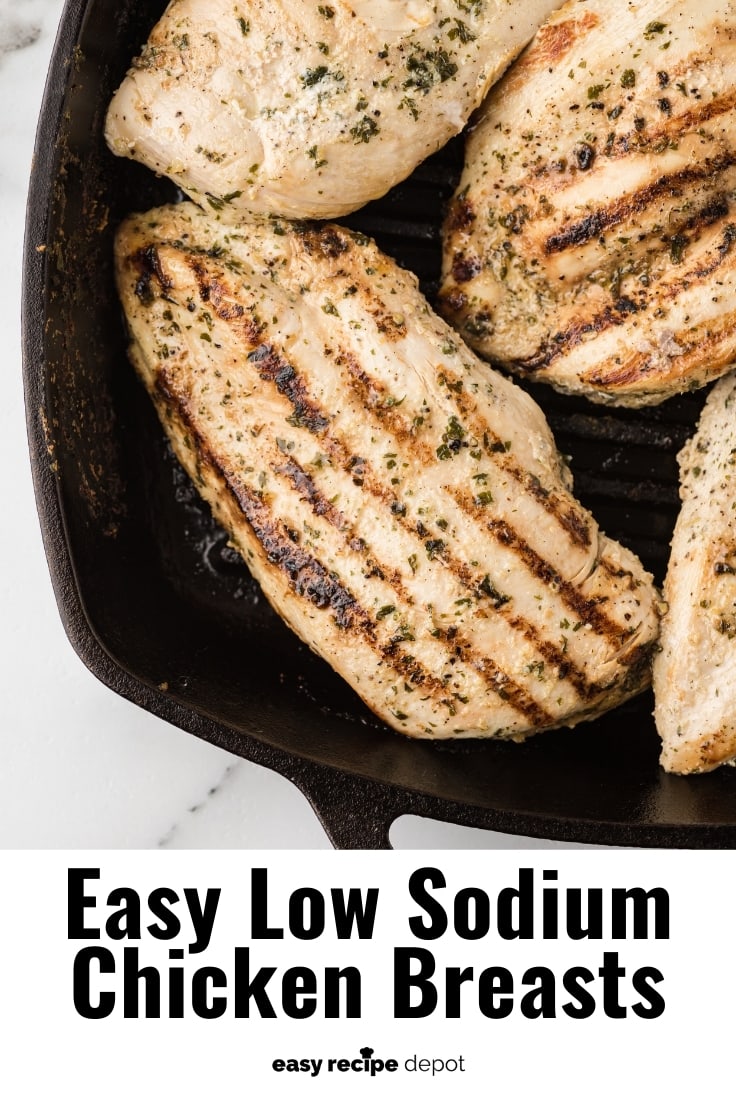
Easy Low Sodium Baked Chicken Breast Recipe
THIS POST MAY CONTAIN AFFILIATE LINKS. PLEASE SEE OUR FULL DISCLOSURE POLICY FOR DETAILS.
This easy low sodium baked chicken breast recipe will quickly become a family favorite. Your family won’t even miss the salt.
Perfectly seasoned baked chicken breasts without the addition of salt is a heart healthy dish even the kids will love. A simple blend of herbs and spices is all you need to make these scrumptious low sodium chicken breasts.
Want more recipes like this? Sign up today to get them right in your inbox plus we’ll send you our FREE guide, Ready, Set, Eat! to learn our 3 simple secrets to help you meal plan like a pro!
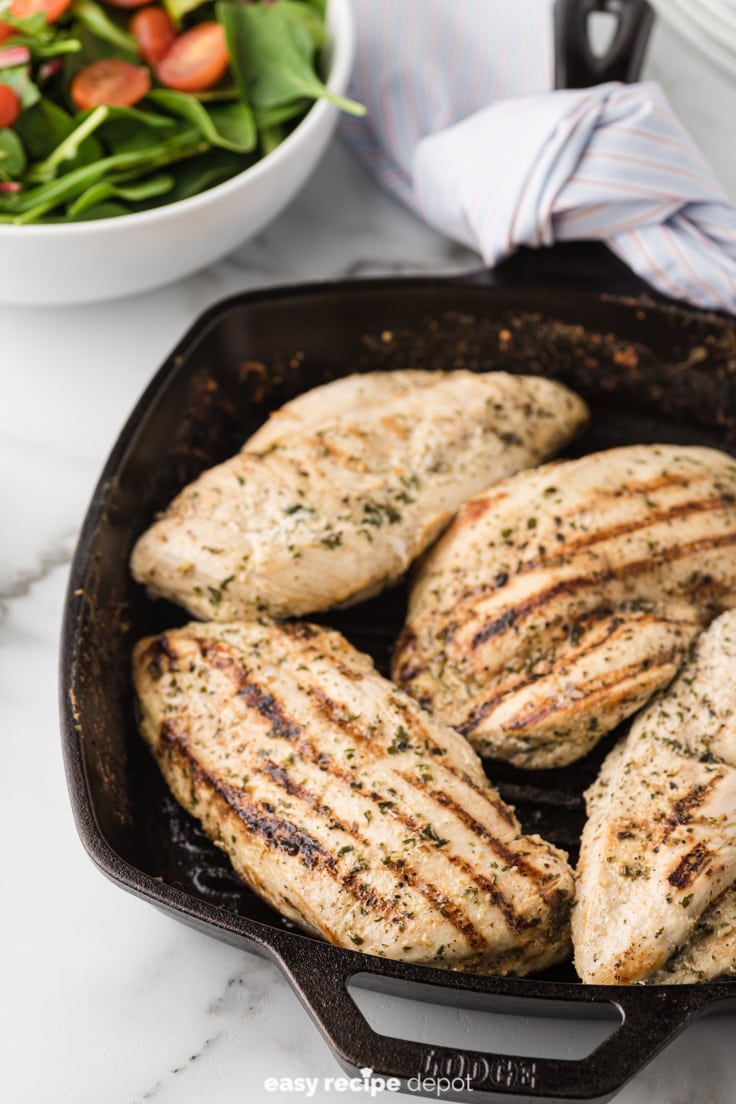
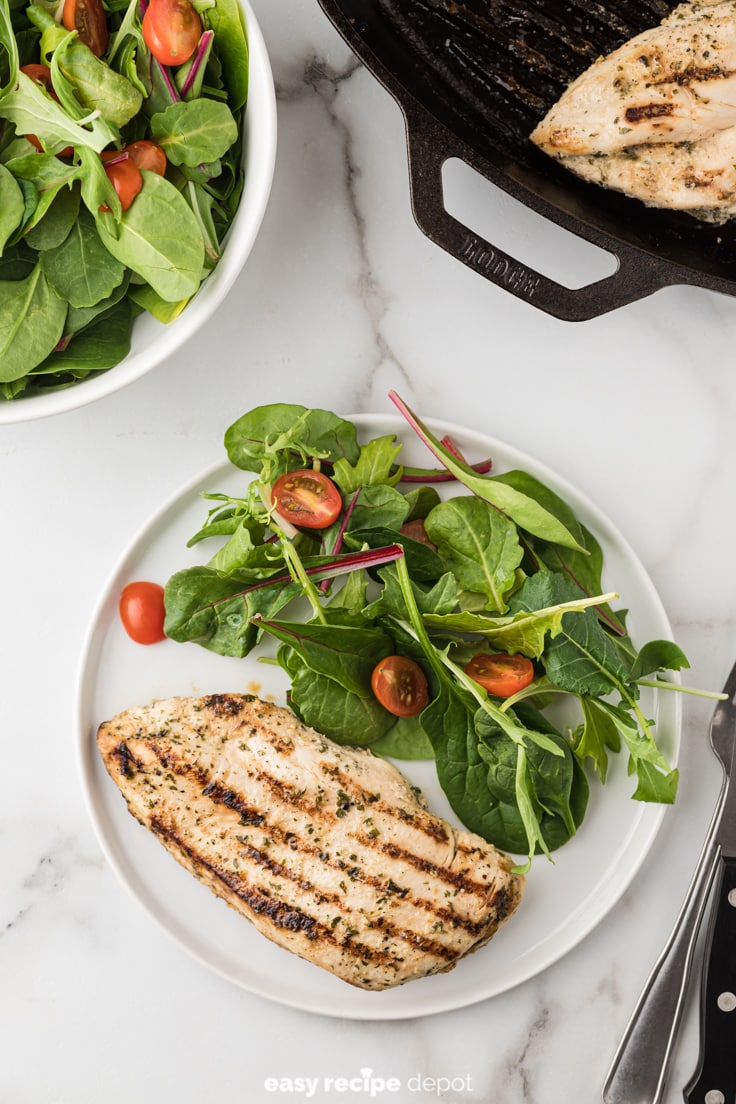
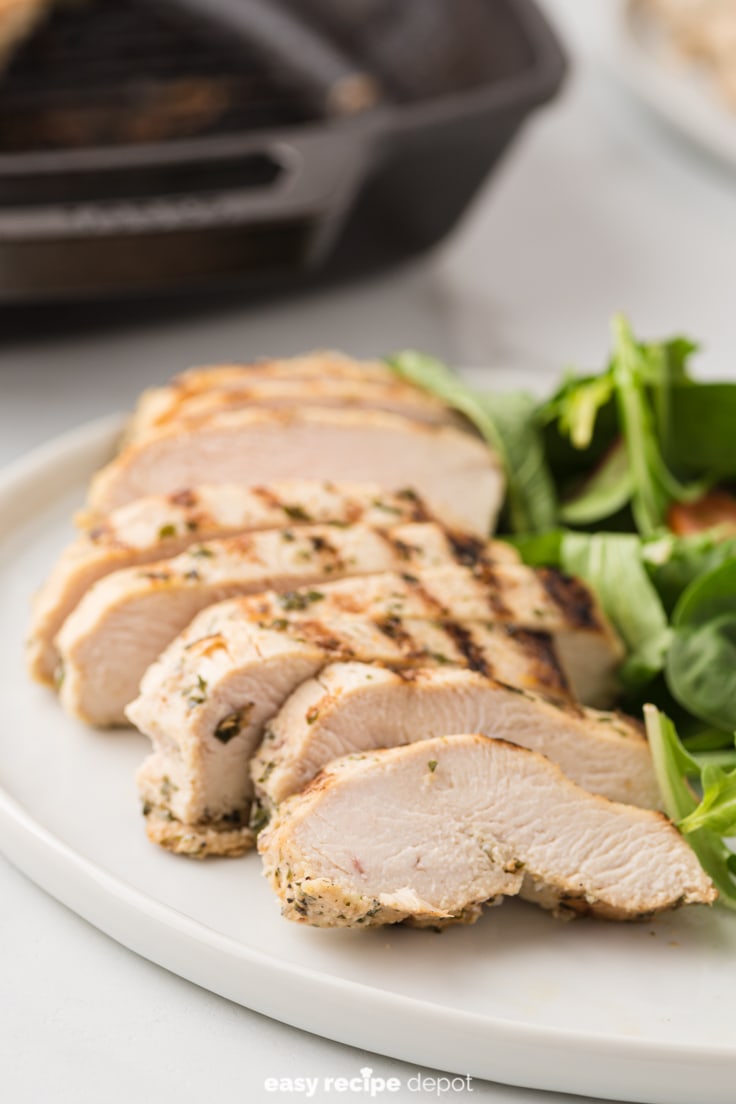
An ideal weeknight dinner, accompany these low sodium baked chicken breasts with a simple mixed green salad and some roasted vegetables. A quick and easy meal on the table in no time these chicken breasts will have you saying “these can’t possibly be good for me?!?”
A healthy low sodium meal perfect for after a trip to the gym or a long day wrangling the kiddos. A hint of garlic, onion, and black pepper with just the right amount of acidity from the white wine vinegar will have your mouth watering. Let’s get cookin’!
How To Make Easy Low Sodium Baked Chicken Breasts
These low sodium chicken breast are quick and easy. A simple marinade made with pantry staples and without additional salt is all you’ll need.
What You Need:
Here’s what you’ll need from the store. The exact amounts are in the printable recipe card at the bottom of this post.
Kitchen Tools Needed:
- Grill pan (or any heavy bottomed oven proof skillet)
- Tongs
- Ziploc bag or shallow baking dish
- Meat mallet
- Plastic wrap
- Non-stick cooking spray
- Digital meat thermometer
Ingredients Needed:
- Boneless skinless chicken breasts
- White wine vinegar
- Olive oil
- Onion powder
- Garlic powder
- Black pepper
- Parsley flakes
Easy Low Sodium Baked Chicken Breast Tips
How to Marinade Chicken Breasts
The marinade for these low sodium chicken breasts is so simple and made with ingredients you most likely already have in your pantry.
Prior to marinating your chicken, pound your chicken breasts with a meat mallet to an even thickness. This will help ensure the baked chicken breasts cook evenly and you don’t end up with dry edges. Place the chicken breast between two layers of plastic wrap and take out your stress from the day. The plastic wrap will help contain the juices from the raw chicken splattering all over your kitchen. Safety first people. No meat mallet? No problem! You can use a rolling pin to pound out your chicken breasts.
Simply combine the marinade ingredients in a ziploc bag or shallow baking dish. Feel free to play around with your spice blend. Just remember no salt! The easy thing to remember about a marinade is all it requires is a fat (olive oil), an acid (vinegar) and herbs and spices (garlic powder, onion powder, black pepper, and parsley).
Once in the marinade, put your chicken breasts back in the fridge and marinate for at least an hour. Five to six hours will give you the best flavor and texture. If you don’t have that long even 10 minutes of marinating will give flavor to the outside of your chicken. The general rule of thumb is marinating with an acid (vinegar) can marinate for up to 24 hours. Just remember longer doesn’t necessarily mean more flavor. The marinade will tenderize your chicken and if you marinate too long the meat will have an unpleasant texture.
How Long to Bake Chicken Breasts
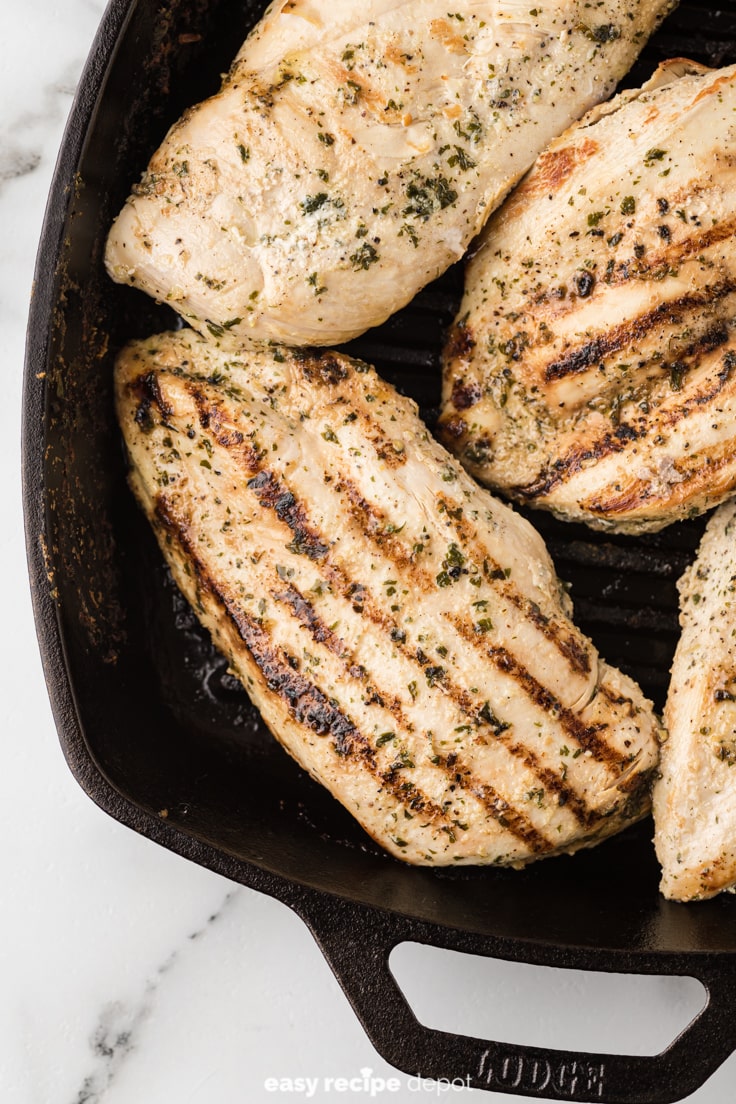
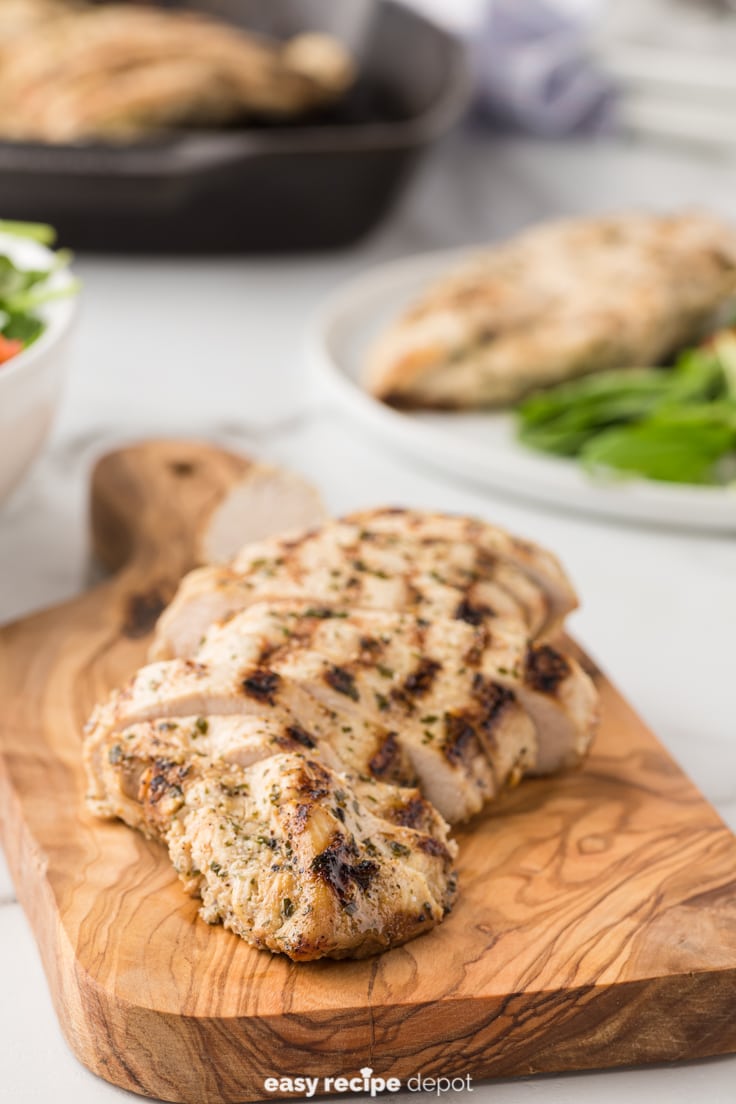
The trick to cooking these low sodium chicken breasts is to give them a good sear in a hot pan and then finish cooking in a 375 degree oven. Searing your chicken first will seal in the juices and prevent dry overcooked chicken.
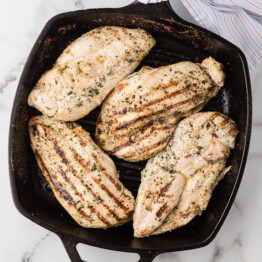
First things first, when searing any meat heat your pan first. You want it good and hot to achieve the perfect sear. A cast iron grill pan will give you beautiful grill marks indoors. Don’t have a cast iron grill pan? Any heavy bottomed oven proof skillet will work. I prefer a cast iron skillet (grill or flat bottomed) which i know can be intimidating. Taking care of a cast iron skillet is easier than you might think.
Once the pan is heated simply sear the chicken for 1.5 minutes per side and then transfer the skillet to the preheated oven. Bake for 8-10 minutes. Using a digital meat thermometer (aka your best friend in the kitchen) start checking for doneness at 8 minutes. You can always cook them longer but you can’t cook them less.
Always remember overcrowding your pan is your enemy. If you overcrowd your pan the chicken will steam rather than sear. Want to make this recipe for a crowd? Sear your chicken in batches and transfer to a foil lined baking sheet and transfer to the oven when all the chicken breasts have been seared.
Chicken Breast Cooking Temperature
Begin checking your baked chicken breasts with a digital meat thermometer at 8 minutes in the 375 degree oven. Your low sodium chicken breasts will be done when the internal temperature reaches 165 degrees.
Always let your chicken rest for 5 minutes before serving. This will allow the baked chicken breasts to finish cooking and redistribute their juices helping prevent dry over cooked chicken. Bon appetit!
Easy Low-Sodium Chicken Breast Recipe
SERVINGS
Equipment
- Meat Mallet
- Gallon-sized resealable plastic bag
- Cast Iron Grill Pan
- Cooking Spray
- Tongs
- Food Thermometer
Ingredients
- 2 boneless skinless chicken breasts pounded to even thickness (about 1/2 or slightly more)
- 2 tablespoons white wine vinegar
- 1 teaspoon olive oil
- 1/2 teaspoon onion powder
- 1/4 teaspoon garlic powder
- 1/2 teaspoon fresh ground pepper
- 1 teaspoon parsley flakes
Instructions
- Place the chicken in a gallon-sized resealable plastic bag and pound the chicken with the flat side of the meat mallet to 1/2 inch – 3/4 inch thick so that it has an even thickness throughout.
- Add all other ingredients to the bag and close the bag. Mix the marinade and the chicken together by gently kneading the bag until the mixture is well combined. Place chicken in marinade and refrigerate for at least an hour.
- Preheat the oven to 375 degrees F/190 degrees C.
- Spray grill pan with non-stick cooking spray and set the pan on high heat on the stovetop. Let the pan get very hot first – this is essential! It should take at least 5 minutes.
- When the grill pan is good and hot, add chicken with tongs. Don't move or touch it for exactly 1.5 minutes! Then, turn it over and grill the other side for exactly 1.5 minutes. Now, place the whole thing in the oven for 8-10 minutes.
- Remove from oven and use an instant read thermometer. Chicken is done when internal temperature is 165 degrees F.
- Let stand on a plate for about 5 minutes before serving.
Notes
pre-seasoned.
Nutrition

Love these recipes? Get our latest recipes in your inbox. Sign up now and we’ll also send you our FREE guide, Ready, Set, Eat! to learn our 3 simple secrets to help you meal plan like a pro!
More Easy Recipes
If you enjoyed this baked chicken breast recipe, then you will love these dinner recipes too:

This is one tasty chicken recipe! Thanks for sharing this!
Good recipe but the cooking oven time is way off! 8 to 10 minutes be careful with that timing and always use a reliable thermometer.
Joseph – do you think the 8-10 min in oven is too long? or too short?!
what do you mean about the time.. more or less
thank you i will try it today for a friend I don”t eat chicken bot it sound delicous.
Thanks for the comment Rose! Please post back and let us know how your friend likes it!
ERD Team
This is a super tasty recipe that I will make again and again. My husband positively raved about this dish!
Thanks Jane, we’re so glad that you and your husband loved the recipe! Please let us know if you try any other recipes from Easy Recipe Depot!
Kent
Finally an easy, delicious and low- sodium marinade! It was great on the chicken. Would it be as good for pork chops? Thanks.
Absolutely! Give it a try and let us know how it turns out for you, Sheila!
Made this tonight as husband is now on a low sodium diet. We both loved it. Will be on our monthly menu going forward.
Hi Val!
This is wonderful to hear! We especially love that you’ll be putting it on your rotation menu for you and your husband. This is music to our ears! If you’d like more recipes in your inbox, be sure to subscribe to our foodie newsletter: https://clutter-keeper.ck.page/38efba5561
Happy cooking!
Lisa, Easy Recipe Depot Customer Care